
What to Know Before Installing Landscape Uplighting
Landscape uplighting turns a plain yard into something people notice from the street, and September is one of the best months in the Central Valley to plan the project. Evenings are getting shorter, the ground is still soft enough to trench without fighting winter mud, and the heat has backed off enough that a crew can work comfortably through the afternoon. Uplighting works by placing fixtures low to the ground and aiming the beam upward at a tree trunk, a stone column, a stucco wall, or an architectural feature, which creates depth and shadow that flat floodlights never produce. The catch is that good uplighting is far more than sticking a few fixtures in the dirt and hoping for the best. Voltage drop, transformer sizing, fixture placement, wire burial depth, and California Electrical Code requirements all determine if the system looks great in year five or fails by Christmas. Homeowners in Patterson, Modesto, and Turlock often start with a big-box kit, then call an electrician a season later when half the lights have gone dark. Understanding the decisions up front saves money, saves rework, and gets you a yard you actually enjoy after sunset. This guide walks through what matters before the first fixture goes in the ground.
Planning Your Landscape Uplighting Design and Layout
The design phase decides almost everything about how your landscape uplighting will look and how long it will last. Before anyone talks about fixtures or wattage, walk the property at night with a flashlight and aim it at the features you want to highlight. That simple exercise tells you more than any catalog, because you will immediately see which trees have interesting bark, which walls have texture worth washing, and which spots throw ugly shadows onto windows. Most Central Valley homes have three or four genuinely worthwhile uplighting targets, not twelve, and restraint reads as professional while overkill reads as a car dealership. You also need to map where the transformer will live, where the wire will run, and how far the farthest fixture sits from the power source. Those distances drive voltage drop calculations, and voltage drop is the number one reason cheap systems produce dim, yellow, uneven light at the far end of the run. Plan the layout on paper first, then adjust in the field once you see the beams in place.
Choosing Uplighting Targets for Your Landscape Design
Trees are the classic uplighting target, and for good reason, because the trunk gives you a vertical surface and the canopy catches the spill light beautifully. Valley oaks, ash, crape myrtle, and mature olive trees all take uplighting well because their bark has texture that grazing light exaggerates. For a single trunk under about twelve inches in diameter, one fixture placed twelve to eighteen inches from the base usually does the job. Larger specimens and multi-trunk trees need two or three fixtures spaced around the base so the tree does not look flat from the street. The beam angle matters as much as the wattage here; a narrow spot beam of ten to fifteen degrees sends light high into the canopy, while a wider flood beam of thirty-five to sixty degrees washes the lower trunk and nearby foliage. Mixing the two on the same tree gives you the layered look that professional installations have and homeowner kits usually miss.
Architectural features are the second category worth lighting, and they include stucco columns, stone veneer, entry archways, and gable peaks. Wall washing with uplighting works best when the fixture sits close to the surface, roughly six to twelve inches out, so the beam grazes the texture and throws small shadows that make the material look dimensional. Push the fixture too far back and you get a flat, washed-out patch of light that flattens everything the mason worked hard to create. Symmetry helps enormously on the front elevation, so if you light one column, light its twin at the same intensity and the same distance. Avoid aiming any fixture where the beam will land in a bedroom window, your own or a neighbor’s, because that complaint arrives fast and the fix is never convenient. Shielded fixtures and glare guards solve most of these problems when placement alone cannot.
The third consideration is what you should not light, and this is where restraint earns its keep. Utility boxes, hose bibs, air conditioning condensers, trash enclosures, and bare fence sections gain nothing from illumination and only pull the eye away from the features you paid to highlight. Dark space is a design element, not a failure, and the contrast between lit and unlit areas is exactly what creates drama in a night landscape. Leaving gaps also reduces your fixture count, which lowers the transformer size you need and cuts both material and energy cost. Many homeowners in Salida and Ripon find that a well-designed eight-fixture system outperforms a poorly planned sixteen-fixture system in both appearance and reliability. Fewer, better-placed lights almost always beat more lights scattered evenly around a property. Start conservative, live with it for a few weeks, and add fixtures later if a spot genuinely needs them.
Landscape Uplighting Fixture Types and Beam Selection
Uplighting fixtures generally fall into three families, and each one solves a different problem in the landscape. Directional spotlights sit on a stake, pivot on a knuckle, and aim wherever you point them, which makes them the workhorse for trees and walls. Well lights install flush with grade in a canister, which hides the fixture entirely and works beautifully along walkways or against a wall where a stake would be a tripping hazard. Bullet lights are a compact directional style that reads as less visible during the day, and they suit tighter planting beds where a large housing would stand out. Most residential systems use a mix, with directional spots doing the heavy lifting and well lights handling the spots where fixtures need to disappear. Match the family to the location before you shop by wattage, because the wrong housing style in the wrong spot creates maintenance headaches that no amount of lumens will fix.
Fixture material matters more than most homeowners expect, especially in Central Valley conditions where sprinkler water, hard water minerals, and summer heat all attack outdoor equipment. Cast brass and copper cost the most up front and last the longest, developing a patina rather than corroding through, and they typically carry the strongest manufacturer warranties. Powder-coated aluminum sits in the middle and performs well as long as the coating is not chipped by a string trimmer or a shovel. Composite and plastic fixtures are the cheapest option and are usually the ones failing in yards two or three seasons after installation, because UV exposure makes the housings brittle and the gaskets stop sealing. Sprinkler overspray is the hidden killer here, since mineral-heavy irrigation water etches lenses and works into any seam that is not properly gasketed. Choosing a solid brass fixture for high-exposure locations and saving money on protected spots is a reasonable middle path.
Beam angle and color temperature finish the fixture decision, and both are easy to get wrong. Beam angle controls how tightly the light is focused, and the general rule is that taller targets need narrower beams while wide, low targets need broader ones. A forty-foot tree lit with a sixty-degree flood produces a bright ring of light on the lower trunk and almost nothing in the canopy, which wastes the fixture entirely. Color temperature is measured in Kelvin, and for residential landscapes, 2700K to 3000K produces the warm, inviting tone that flatters stucco, wood, and green foliage. Anything at 4000K or above reads blue and cold on a home exterior, which is why so many DIY installations look like a parking lot instead of a garden. Keep every fixture in the system at the same Kelvin rating, because mismatched color temperatures across a single yard are obvious and impossible to ignore once you notice them.
Transformer Sizing and Voltage Drop in Landscape Uplighting
Nearly every residential landscape uplighting system runs on low voltage, meaning a transformer steps 120 volts down to 12 or 15 volts before it reaches the fixtures. Sizing that transformer correctly is the single most technical decision in the project, and getting it wrong causes dim lights, premature LED failure, and in bad cases an overheating transformer. The basic calculation adds up the wattage of every fixture on the system, then adds a safety margin so the transformer never runs at full capacity. Industry practice is to load a transformer to no more than about eighty percent of its rated capacity, so a system drawing 160 watts of fixtures wants a 200 watt or 300 watt transformer rather than a 200 watt unit run flat out. Building in extra headroom also lets you add fixtures later without replacing the transformer, which is worth the modest cost difference on day one. Multi-tap transformers with 12, 13, 14, and 15 volt terminals give an installer the ability to compensate for long runs by feeding them at higher voltage.
Voltage drop is the reason those multi-tap terminals exist, and it is pure physics rather than a product defect. Every foot of wire adds resistance, and resistance eats voltage, so a fixture two hundred feet down a run receives measurably less voltage than the first fixture on the line. LED fixtures tolerate a range, typically operating well between roughly 10 and 15 volts, but push them below that window and they dim, shift color, or flicker. Wire gauge is the main defense, and heavier wire has less resistance, which is why professional installs commonly use 12 gauge or 10 gauge cable rather than the 16 gauge included in retail kits. Run configuration matters just as much; a hub or T-method layout distributes voltage far more evenly than a single daisy chain where every fixture taps the same long line. An electrician should measure actual voltage at the first and last fixture with a meter, not simply assume the math worked out.
The transformer location and its power source are the parts most likely to create a code problem. The transformer needs a dedicated or appropriately rated GFCI-protected receptacle, mounted per manufacturer instructions, typically at least twelve inches above grade and in a location that stays dry and accessible. Cheap indoor extension cords running out a garage door are both a code violation and a genuine fire risk, and they are more common in Central Valley yards than anyone would like. If your exterior does not already have a suitable outdoor receptacle, adding one is part of the project scope and requires proper wiring, weatherproof in-use covers, and GFCI protection. Timers, photocells, and smart controllers usually live at the transformer, so plan for a spot you can reach without crawling through shrubs twice a year. Need a properly protected exterior outlet for your transformer? Click here for our GFCI outlet installation service.
Installation Requirements and Code Rules for Landscape Uplighting
The physical installation is where a landscape uplighting project either becomes a durable system or a recurring repair bill. Wire routing, burial depth, connection method, and fixture mounting all have code requirements and best practices behind them, and skipping any of them shortens the life of the system dramatically. California follows the National Electrical Code with state amendments, and low voltage landscape lighting sits under Article 411 along with related rules for outdoor wiring and GFCI protection. Homeowners are often surprised that low voltage still has rules, but twelve volts at high amperage can absolutely start a fire in a mulch bed if a connection corrodes and heats up. Permits are typically required when the project includes new branch circuit wiring, a new exterior receptacle, or any work at the panel. The lighting portion itself may not need a permit, but the power feeding it usually does. Working with a licensed electrician means those details get handled correctly rather than discovered during a home sale inspection.
Burying Landscape Uplighting Wire the Right Way
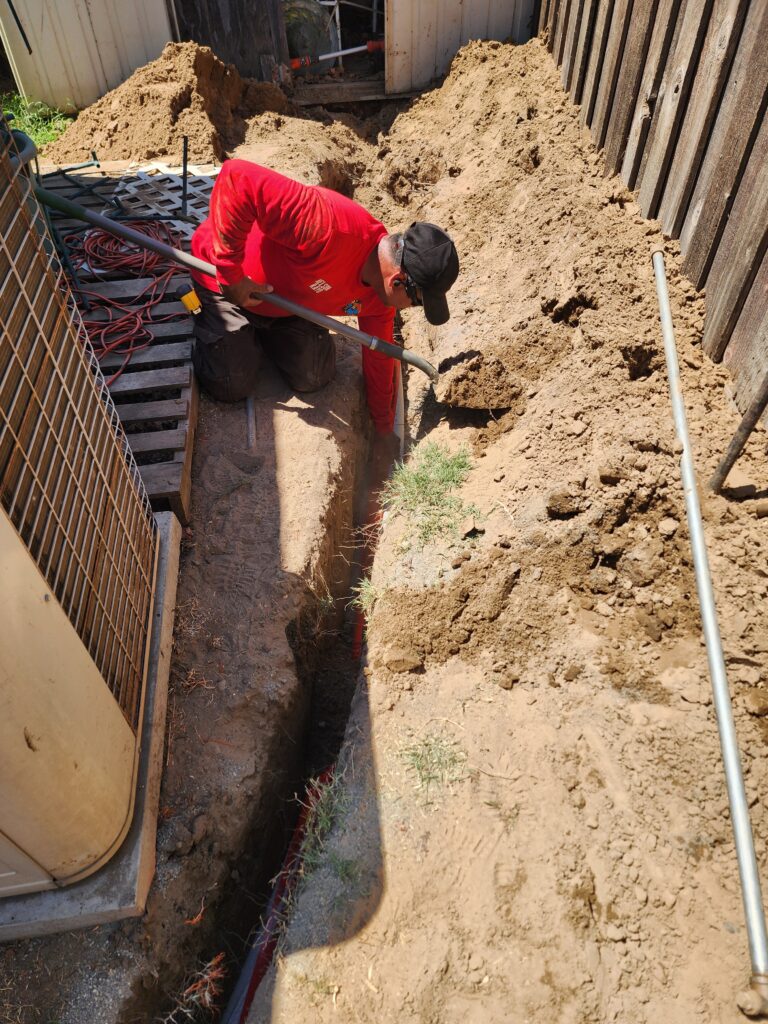
Low voltage landscape cable does not require the same burial depth as line voltage branch circuits, but it still needs protection from shovels, aerators, and dogs. Common practice for low voltage landscape wire is a trench roughly six inches deep, which keeps it below normal garden cultivation and below the reach of most edging equipment. Under driveways, walkways, and any area subject to vehicle traffic, the cable belongs in conduit and buried deeper, because point loading through pavers will eventually damage unprotected cable. Sleeving under hardscape during the initial install costs very little and saves an enormous amount of work if a wire ever needs to be replaced. Mark your runs on a simple site sketch and keep it with your home records, since the next person to plant a tree in that bed will thank you. Trenching alongside existing irrigation lines is convenient but requires care, because a shovel strike on a lateral means you are fixing sprinklers instead of finishing lights.
The connections themselves fail more often than the wire, and this is where the difference between professional and retail installations shows up fastest. Twist-on wire nuts, even ones marketed as outdoor rated, are a poor choice for direct burial because moisture wicks into the connection and corrodes the copper. Silicone-filled, direct-burial-rated connectors are the correct answer, and quality installers use them at every splice without exception. Corrosion at a splice raises resistance, which causes voltage drop at that point, which dims everything downstream and creates a heat point at the connection. Once oxidation starts, it progresses, so a system that worked fine in October can be visibly dim by February. Leaving a small service loop of extra wire at each fixture is another professional habit, because it lets a fixture be repositioned or a connector be redone without pulling new cable.
Cable gauge selection interacts with everything discussed above, and undersizing it is the most common shortcut in DIY installs. Retail kits typically include 16 gauge cable rated for short runs and small fixture counts, and using it for a two-hundred-foot perimeter run guarantees disappointing results. For most residential systems, 12 gauge direct burial cable is a reasonable baseline, with 10 gauge used on long runs or heavily loaded circuits. The wire cost difference across an entire property is usually under two hundred dollars, which is trivial compared to the cost of re-trenching a yard because the lights were dim. Splitting the load across multiple runs from the transformer, rather than one enormous loop, also keeps each run shorter and voltage more consistent. Doing this correctly the first time is the difference between a system you forget about and a system you keep calling about.

GFCI Protection and Code Compliance for Landscape Uplighting
Every outdoor receptacle feeding a landscape lighting transformer requires GFCI protection, and that requirement is not negotiable under current code. Ground fault circuit interrupter devices monitor the current going out and coming back, and they cut power in milliseconds when they detect a mismatch that could mean current is traveling through a person. Wet landscapes, irrigation, and metal fixtures create exactly the conditions where that protection matters. The receptacle also needs a weather resistant rating and an in-use cover, sometimes called a bubble cover, which keeps the outlet protected while a plug is inserted. Older Central Valley homes frequently have exterior outlets that predate these requirements, and upgrading them is straightforward work for a licensed electrician. If your GFCI trips repeatedly after the lighting is installed, that is a signal of a real fault somewhere in the system, not a nuisance to be bypassed.
Article 411 of the National Electrical Code governs low voltage lighting systems and sets several limits worth knowing. Systems are generally limited to 30 volts or less and specific maximum current ratings, and listed transformers, fixtures, and cable are required rather than improvised assemblies. Fixtures must be listed for outdoor use and installed per their instructions, including any minimum clearance from combustible material. The code also addresses where low voltage cable can and cannot be run, including restrictions near pools and spas where separate and much stricter rules apply. Any uplighting near a pool, spa, or water feature moves the project into pool wiring territory, where clearance distances and bonding requirements are strictly enforced. Planning lighting around a pool area? Click here for our pool wiring service.
Permit requirements vary by jurisdiction across Stanislaus, San Joaquin, and Merced counties, so a quick check with the local building department is always worthwhile. In general, the low voltage lighting itself often falls outside permit requirements, but adding a circuit, adding a receptacle, or working inside the panel does require one. Some homeowners skip permits assuming nobody will notice, and then run into problems years later when an appraiser or inspector flags unpermitted electrical work during a sale. Permitted work also means an inspector verified the GFCI protection, the conductor sizing, and the connections, which is genuine protection for the homeowner. A licensed contractor pulls the permit as part of the job and handles the inspection scheduling. The cost is modest and the peace of mind is substantial.
Why You Need Professional Landscape Uplighting Installation
Landscape uplighting looks simple from the outside, which is exactly why so many systems installed by well-meaning homeowners underperform within a year or two. The skills that matter are not glamorous; they are voltage measurement, load calculation, proper splicing, and knowing which code sections apply to which part of the job. A professional install also comes with something a kit cannot provide, which is accountability when something stops working. Fall is the right time to schedule this work in the Central Valley, because daylight hours are shrinking, holiday entertaining is coming, and crews have availability before the winter rush. Getting the system in now means you enjoy it through the darkest months of the year rather than waiting until spring.
Long Term Value of Professional Landscape Uplighting
A properly designed landscape uplighting system adds real curb appeal and real property value, and appraisers and buyers both notice a home that presents well at night. Exterior lighting is consistently cited among the improvements that influence first impressions during evening showings, which matters in a market where buyers often drive by after work. Beyond resale, uplighting extends the usable hours of your outdoor space, making patios, walkways, and entertaining areas comfortable well after sunset. Security benefits come along with the aesthetics, since a well-lit exterior removes the dark approach paths that make a property attractive to anyone up to no good. The combination of appearance, usability, and deterrence is what makes uplighting one of the better value exterior upgrades available.
Durability is where professional installation pays for itself over time. Quality brass fixtures, correctly sized wire, buried connections that stay dry, and a transformer with headroom will run for well over a decade with only lamp replacement and occasional aiming adjustments. Retail kits with plastic housings, thin wire, and undersized transformers frequently need substantial repair or replacement within three to five seasons. The cost difference at installation is real, but the cost per year of service tilts heavily toward the professional system. Warranty coverage on higher-grade fixtures often runs ten years or more, which no kit can match.
Maintenance is minimal on a well-built system, but it is not zero, and knowing what to expect helps. Fixtures need occasional cleaning because Central Valley dust and hard water spotting will dull a lens over a season. Tree growth changes the geometry of your original aiming, so a yearly adjustment keeps beams landing where they should as canopies fill in. Landscaping changes, new plantings, and irrigation adjustments can all shift how the system performs, and a quick service visit each fall keeps everything sharp. Timers and photocells drift with seasonal daylight changes and benefit from a reset twice a year. None of this is difficult, and an established relationship with an electrician makes it routine.
Common Landscape Uplighting Mistakes a Professional Prevents
The most frequent failure a professional prevents is the undersized transformer, which shows up as dim lights on the far end and a transformer that runs hot. Homeowners typically total their fixture wattage, buy a transformer that matches exactly, then add three more fixtures the following spring and push the unit past its limit. An electrician sizes for future expansion and measures actual voltage at the fixtures rather than trusting a label. That single step eliminates a huge percentage of the callbacks that plague landscape lighting. It also protects the LED drivers in your fixtures, which degrade quickly when fed inconsistent voltage.
Poor aiming is the second common problem, and it is more visible to guests than any technical issue. Beams that land in windows, fixtures aimed at nothing in particular, and lights spaced with mechanical evenness across a yard all read as amateur work. Professional aiming happens at night, on site, with someone standing at the street and someone adjusting fixtures, because that is the only way to see what the neighbors will see. Glare control through shields, louvers, and honeycomb baffles keeps the light on the target and out of your eyes. These adjustments cost nothing in materials and make an enormous difference in the final result.
The third mistake is improper connections, and it is the one that eventually turns into a service call in the middle of winter. Wire nuts in a mulch bed, cable stapled to a fence, and splices made with electrical tape all fail, and they fail at the worst time. Direct burial connectors, proper trenching, and conduit under hardscape prevent nearly all of it. An electrician also documents where the runs go, which saves everyone time when a repair or expansion happens later. Want your exterior lighting done right from the start? Click here for our outdoor lighting installation service.
Why Choose Frayer Electric for Landscape Uplighting Installation
Frayer Electric is licensed, insured, and locally owned, and we have installed and serviced exterior lighting across Patterson, Modesto, Turlock, Tracy, Manteca, and the surrounding Central Valley. We know the conditions here, from hard irrigation water to summer heat that punishes cheap fixtures, and we specify equipment that holds up to it. Every quote we give is straightforward with no hidden fees, so you know the fixture count, the wire gauge, the transformer size, and the total before we start. We handle permits and inspections when the job requires them, which keeps your electrical work documented and clean for any future sale.
Our crews do the unglamorous parts correctly, which is what determines how your system looks in year six. That means proper trench depth, direct burial connectors at every splice, conduit under hardscape, GFCI-protected power at a weatherproof receptacle, and voltage verified with a meter at the farthest fixture. We aim fixtures at night with someone at the curb, because a system that looks right from the driveway is the entire point. If something needs adjusting after installation, we come back and adjust it.
We offer discounts for veterans, seniors, and first responders, and we back our work because we live and work in the same communities we serve. Emergency service is available 24/7 for the times when something goes wrong outside business hours. Call us at (510) 861-6247 or email info@frayerelectricinc.com to schedule an estimate for your landscape uplighting project. Fall is the right window to get this done, and we have availability now before the holiday season fills up.